Tuesday, January 31, 2012

10 Things to Know Before You Buy Replacement Windows


Buying replacement windows is a great way to improve the beauty, value and comfort of your home and it is a great investment. Remodeling Magazine’s annual Cost v. Value Report for 2007 says that homeowners in San Diego can expect to recoup up to 98.5% of their cost for installing vinyl replacement windows. But before you make any significant investment, you want to be sure you have done your homework and are ready to make a well-informed decision. Here are some things to consider before you sign on the dotted line.

1. The difference between “replacement” windows and “retro-fit” windows. A replacement window is simply any window that replaces an existing window. This can be done using a “new construction” window or a “retro-fit” window. But the terms “replacement” and “retro-fit” are often used interchangeably, even by window professionals, so don’t let that confuse you. What installation method is best for your home?

a. New Construction - If you are planning to re-stucco or replace your siding at some point in the near future, then using new construction windows may be the best choice. This involves cutting back the stucco or siding four to eight inches from the edge of your window, removing the flashing paper and then removing the old window. Next your contractor will install the new window, apply new flashing paper, and then replace the stucco, usually a three-step process. The advantage to using new construction windows is that your new windows will be the same size as your old windows. The disadvantage is that if you are not planning to re-stucco your house, you will eventually be able to tell that the stucco was patched. The old stucco and the new stucco will not expand and contract at the same rate and over time cracks will appear between the old and new stucco. This installation method also costs considerably more than using the “retro-fit” installation method.

b. Retro-Fit – If you are not planning to re-stucco your house any time soon or if you are concerned about your budget, a retro-fit window is probably your best choice. Installing retro-fit windows does not require any stucco damage because the perimeter frame of the old window will not be removed. The new retro-fit window is designed to fit inside your old window. Your contractor will use a different installation method, and a different type of retro-fit window, depending on whether your old windows are metal or wood. Because your new window is fitting inside the frame of your old window, it will need to be slightly smaller than the old window was. In most cases this is barely noticeable, but if the old window was small in the first place, such as a bathroom window, it may seem obvious. Also, some window companies have a very wide exterior flange that some homeowners find unattractive.

2. What type of windows do you have now? Metal or Wood? If you are using retro-fit windows, the type of windows you have now will make a difference in how your new windows will be installed.
a. Metal Windows – Typically, metal windows are replaced using a retro-fit window that has an exterior flange that will conceal your old window frame from the outside. The contractor will remove the glass and any bars that divide the window to create one large opening. The new window will come with a flange that extends about two inches all around the perimeter of the frame. The new window will fit inside the opening of your old window and the flange will conceal the perimeter frame of your old window. Your contractor will use trim to conceal your old window frame from the inside. Different contractors offer different interior trim options.
b. Wood Windows – Typically, wood windows will be replaced using a retro-fit window that has a sill (bottom) that is designed to accommodate the slope of the old wood window sill. The contractor will remove either the interior or the exterior stops of the old windows, remove the sash (moving parts that hold the glass) and leave the perimeter frame in place. The new window will fit into the old perimeter frame. Some companies offer an aluminum wrap for the old wood window sill, but be sure to ask to see some jobs where this has been done. It is difficult to do well, and the wrap often has gaps where the edges do not line up well. In most cases, a good paint job will finish off the old window sill nicely and painting will help keep the charm of the old wood windows.
(See How We Install from the main Menu of our web site) www.LaMesaDoorWindow.com.
3. Know what type of frame material you want for your windows. There are advantages and disadvantages to all the frame materials available, so it is a good idea to consider them in advance.
a. Vinyl – Vinyl windows are far and away the most popular choice for window replacement, and for good reason. They are maintenance free, insulate well, make a smooth operating window and are relatively inexpensive. The downside is that they are usually only available in white and tan and vinyl cannot be painted. Some companies offer dark colored vinyl windows, but other companies have withdrawn them from the market due to failures associated with the dark material absorbing too much heat. Always check the warranty carefully.
b. Aluminum – Aluminum windows have poor insulation qualities, but changing your windows from old aluminum windows that are single glazed to new aluminum windows that are dual glazed and have high performing low-e glass will provide a noticeable improvement in insulation. If you already have aluminum windows and you do not plan to replace them all, this may be a good choice so that your new windows more closely match your existing windows. Also, aluminum is available with dark bronze anodized frames which may be a good choice if you want the look of a dark frame, or clear anodized if you want to keep a mid-century contemporary style.

c. Fiberglass – Fiberglass windows insulate well, are maintenance free and are available in dark colors. They are also easily painted if you want to change your color scheme at some point in the future. Unfortunately, fiberglass windows are usually quite expensive, often in the same price range as high-end wood windows.
d. Wood – Wood windows are available with or without a low-maintenance exterior cladding. If you are restoring an old home and want to stay as true as possible to the original windows, then you may want to choose windows without exterior cladding. Unfortunately, they will require regular painting, and if you want dual-glazed windows with low-e glass, they will be nearly as expensive as clad wood windows. Exterior cladding is usually aluminum or vinyl and is available in a variety of colors. If you are planning to retro-fit your existing windows, you will almost certainly need special sizes, and many wood window companies either charge extra for special sizes or do not offer special sizes at all.
4. Understand the glass options available to you.
a. Single glazed vs. Dual glazed
A single-glazed window has just one layer of glass. A dual-glazed (or dual-pane) window has two layers of glass with a hermetically sealed air space between them. With single-glazed windows, there is very little that can go wrong with the glass unless it breaks, but single glazed windows do almost nothing to insulate your home. The advantage to dual-glazed windows is that the air trapped between the panes of glass insulates the way air trapped between feathers in a down comforter insulates. The disadvantage to dual-glazed windows is that the hermetic seal will fail eventually, most experts say in 15 to 20 years, so it is important to choose a window manufacturer who offers a warranty on the dual-glazed units, and who is likely to still be in business 15 to 20 years from now. If not covered by warranty, replacing the dual-glazed units will probably cost as much as your replacement windows did in the first place.
b. Low-E Glass
Low-E is short for “low-emissivity.” It is a high-tech coating on the glass that is designed to block much of the heat and ultra-violet light from the sun, while permitting a large percentage of visible light, so it will reduce solar heat gain and fading without making your home uncomfortably dark. Almost all window manufacturers now consider low-e glass to be standard for new windows, but upgrading from standard Low-E to new high-performing Low-E will provide even greater energy efficiency.

c. Low-Maintenance Coatings
Some window manufacturers are now offering a low maintenance glass coating, sometimes referred to as “self-cleaning” glass. Calling it self-cleaning may be overstating the facts, but the low-maintenance coatings do help your windows stay cleaner and make them easier to clean. Cardinal Glass Industries makes a low-maintenance coating called “Neat.” Cardinal says that Neat-coated glass “harnesses the sun's UV rays to loosen dirt so water can rinse it away, leaving windows virtually spotless. Your windows will stay cleaner longer and will clean easier.”

d. Argon Gas
Argon gas is a colorless, odorless, inert gas that is denser than air and can be used between panes to provide a small improvement in thermal performance and energy savings.
5. Do you want the look of divided lites? The look of divided lites can be created by using true-divided lights, simulated divided lites, or internal grids.
a. True Divided Lites – true divided lites are usually seen in wood windows. Wood (or other window-frame material) is used to actually separate the glass into small rectangles, and each piece of glass, or dual-glazed unit, is glazed into the window separately. This is usually expensive, but has the authentic look of an old wood window.
b. Simulated Divided Lites – Simulated divided lites use one larger piece of glass, and frame material is applied to the glass on the exterior and/or interior of the window to create the look of true divided lites. If the window is dual glazed, a “shadow bar” is often put between the two panes of glass to make the effect more realistic.
c. Internal Grids – Internal grids are placed between the two panes of glass to give the impression of divided lites. This is a low-maintenance option, because when cleaning the windows, you are cleaning one large piece of glass rather than several smaller pieces of glass. Grid material is usually available in a flat or sculptured profile, and is considerably less expensive than either simulated or true divided lites.
6. Know what the manufacturer’s warranty is. Many window manufacturers offer a “lifetime” warranty but the definition of “lifetime” varies widely. Some companies will provide you with replacement parts, but no labor to install the part. Other companies consider “lifetime” to be ten or twenty years. Be especially careful regarding the warranty of the dual-glazed units. Dual-glazed units are likely to last fifteen to twenty years, but when they fail, the cost of replacing them will probably be more than the cost of the replacement windows in the first place, as field labor is usually quite expensive. Some companies will even cover accidental breakage of the glass or the screen. Of course, the warranty is only as good as the company behind it. A company that has been in business for a long time will likely be there if you have a problem many years from now.

7. Know what your rights are. The Contractors State License Board has helpful information about what you should expect from your contractor. You can get more information at:
http://www.cslb.ca.gov/GeneralInformation/Library/GuidesAndPamphlets.asp
 
8. Don’t get pressured into making a decision right away. Many companies spend a lot of money on the marketing needed to get a sales appointment in the first place, and they need to recover those marketing expenses somehow, usually by charging more. They know that if you have time to get competitive bids you are less likely to go with their company, so they sometimes offer big “discounts” if you sign right away. Don’t be fooled. If it is a good deal today, it will be a good deal next week.
 
9. Check referrals. Ask to see a list of customers and ask if you can contact past customers. If they can only offer you a couple of names, be careful. Any company that has been in business for very long should have a long list of satisfied customers.

10. Trust your instincts. If it seems too good to be true, it probably is. Choose the company that you have the most confidence in. Allow them to make a fair profit and you will pay a fair price. Remember “if the deal isn’t good for everybody, then it’s no good at all.”
For more general information about windows, a helpful website is:
http://www.efficientwindows.org/
or learn more at our Learning Center

Wednesday, January 18, 2012

How to Install a Green House Window


Step 1
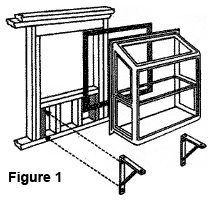
Frame rough opening equal to window call out size. Rough opening should be plumb, square, and sill should be level. For stucco applications furring strips of at least 3/8" thick, should be used around entire perimeter to allow for proper clearance or optional stucco mold can be purchased, see number 5 below. For special size Tru-Frame® Greenhouse Windows the suggested rough opening size is:

Width 5 1/2" Less Fin to Fin Dimension
Height 3 3/8" Less Fin to Fin Dimension


Step 2
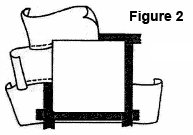
Apply the flashing paper in the normal manner. First the sill strip, then the jamb strips. The top flashing goes on after the window is installed and overlaps the top window fin. (See Figure 2)


Step 3
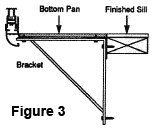
Center the Tru-Frame® Greenhouse Window in rough opening allowing equal clearance on both sides and top. Bottom pan should line up with the finished sill height, allowing for any inside additional materials such as tile (see figure 3). Attach window to jambs, sill, and header with screws long enough to penetrate through any furring strips and deep into framing. A ribbon of caulking between the frame and flashing is a must.


Step 4
For window sizes 5' and larger, support bracing is highly recommended on each end of the window (Warranty could be void without proper support). These supports can be constructed as part of the wall framing or metal support brackets may be fabricated to adequately support the window. Support brackets can be purchased separately from your Tru-Frame® Dealer. Fasteners to be supplied by installer (1/4" X 3" Lag screws are suggested for wall mounting). Brackets must attach to the vertical studs below the window. For 8' windows a third support should also be used in the center. (see figure 3)


Step 5
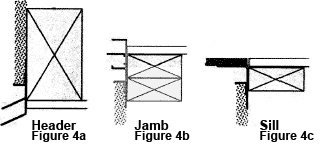
Optional extruded aluminum stucco molding is cut square to fit around the perimeter of the window. Jamb moldings fit between header and sill moldings. Stucco moldings can be purchased separately from your Tru-Frame® Dealer. (See Figure 4a, 4b, and 4c)


Wednesday, January 11, 2012

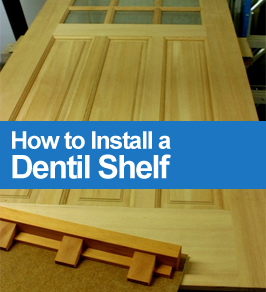
How to Install a Dentil Shelf

 
Important: Please read and understand all installation and adhesive instructions prior to opening the adhesive cartridge.

CAUTION: Make sure your work area is well-ventillated and has air circulation. Adhesive is flammable, keep away from heat and flame. Please wear safety glasses and latex gloves. Avoid contact with eyes and skin. Read warning label on adhesive box. KEEP OUT OF REACH OF CHILDREN.

Note: When painting, the door and dentil shelf should be unfinished when applying dentil shelf. Door needs to be removed from the opening and placed in a horizontal position for a minimum of three hours to allow the adhesive to cure.

Tools Needed: Latex Gloves, Safety Glasses, Mineral Spirits, Soap and Water, Stir Stick, Bristle Brush and Disposable container for mixing.

Installation:

Step 1: Before You Start Protect the underside of the door by laying it flat on padded sawhorses or another padded surface. Position the door with the exterior side facing up. Thoroughly clean the door surface and the dentil shelf with soap and water. Be sure to thoroughly rinse with water to make sure all soap and residue are removed and then dry completely. Surfaces must be completely dry before going on to Step 2.

Step 2: Locate Shelf Position the dentil shelf on the door so that it's centered along the width of the door and parallel to the glass opening (suggested location is entered from bottom of glass frame and top of panel embossments). Use a graphite pencil to lightly mark the location of the top and sides of the shelf on the door face.)

Step 3: Apply Adhesive Open adhesive cartridge as directed in the “DIRECTION FOR USE” instructions on the label of the adhesive cartridge. Dispense adhesive as instructed into a disposable container and mix thoroughly with a clean stir stick for sixty seconds. Using a bristle brush, apply a thin coat of adhesive to the underside of the shelf. Be careful not to allow adhesive on the sides of the shelf. The coating should not be more than 1/16” thick and should be approximately 1/2” away from all edges to help prevent squeeze-out. Carefully press the shelf onto the door face using your pencil lines (from Step 2) as your locating guides. Apply firm pressure to ensure contact with door. You will have approximately 3 to 4 minutes to work with the shelf before the adhesive starts to set. Immediately remove any adhesive squeeze-out with mineral spirits and a clean cloth.

STEP 4: Cure Time The shelf and door should remain in the horizontal position for a minimum of three hours to allow the adhesive to cure. After three hours, the door can be finished if painting or re-installed if staining. Full bond strength is reached at sixteen hours.

STEP 5: Adhesive Disposal Wipe tip clean, retract plunger slightly and close with the special cap. Allow the adhesive in the disposable container to harden in a well ventilated area. Once hardened, properly dispose of adhesive.

Source: plastpro

Tuesday, January 10, 2012

When to use Tempered Safety Glass


When you are doing a window replacement job, you should be aware that there are Universal Building Codes that you need to abide by. The main one you need to understand is when it is required to use Tempered safety glass.

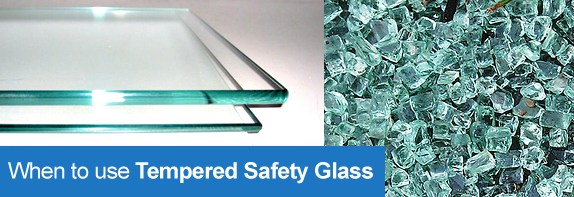
Tempered glass is glass that has an extra proceedure done to it to make it 4 to 5 times stronger. The proceedure involves heating the glass up, and then cooling it down rapidly. This process makes the glass stronger, and also changes the way the glass breaks. The glass shatters into small blocks that are much less likely to cause injurey. That is why Tempered glass is also called Safety glass.

The areas considered to be hazardous safety glazing areas requiring tempered glass are:

1. Glass in any door;

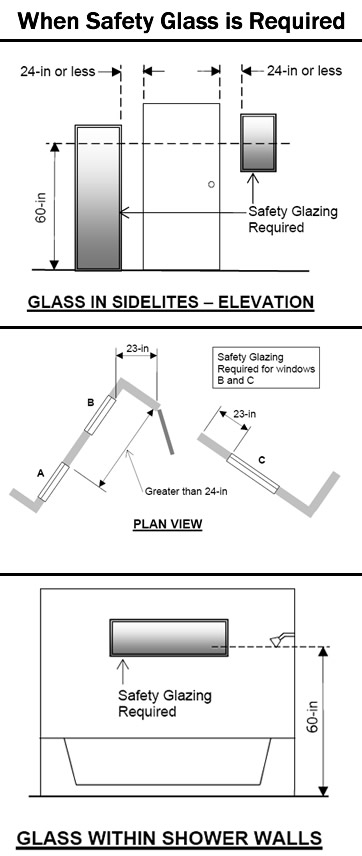
2. Glass in any kind of shower, bathtub area, hot tub, steam room, sauna or whirlpool area where the bottom edge of the glass is less than 60 inches above a standing surface and drain outlet;

3. Glass in fixed or operable panels adjacent to a door where the nearest exposed edge of the glazing is within a 24” arc of either vertical edge of the door in a closed position and where the bottom edge of the glazing is less than 60” above a walking surface:

4. Glass in fixed or operable panels that meets all of the following conditions:

* Bottom edge is less than 18” above floor
* Top edge is greater than 36” above floor
* Total area of glass is greater than 9 sq. ft. (1296 sq.in.)
* One or more walking surfaces within 36” horizontally of the glazing;


5. Glass in walls used as a barrier for indoor or outdoor swimming pools or spas when both of the following exist:

The bottom edge of the glazing is less than 60” above a pool side of the glazing
The glazing is within 5 feet of a swimming pool or spa deck area;


6. Glass in walls enclosing stairway landings or within 5 feet of the bottom and top of stairways where the bottom edge of the glass is less than 60” above a walking surface

You can select tempered glass on any of the windows you order from Discount Door and Window. Select "Glass Strength" option, and choose tempered glass.

For more information about the universal building code on Safety glass check our references:

Wednesday, January 4, 2012

How to Remove an Exterior Door


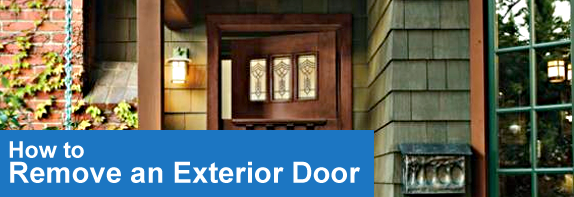
The process of removing an entry door varies quite a bit depending on your situation. There are a few things you should look into first.
  • Check to see if there is an alarm system built into the door. There may be wires that need to be cut, or removed.
  • Check the top horizontal exterior trim, and see if there is an integal flashing that goes behind the trim. It usually sticks out a bit to direct the rain around the door. If there is, then you want to consider leaving the top trim in place. You can still put the door in from by tilting it from the inside. The video below talks about this.  
  • be sure to have an assistant there to help with removing the door frame.
  • Measure the door after you have removed the interior trim, and confirm that the new door you will be putting in fits the opening you are about to create.
Once you have check for these things, you ready to remove the entry door. Below is a video that can help show you how to remove an entry door that has 2 sidelights. The process of taking out an old double door is pretty much the same.

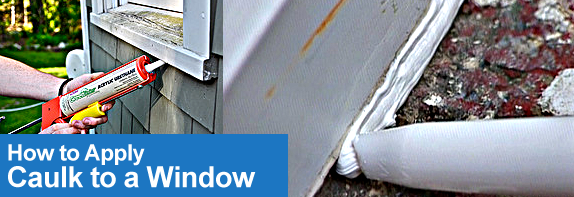
How to apply Caulk to a window


Caulking refers to the process of sealing a gap between two surfaces for the purpose of making it air and watertight. Below is the recommended process of caulking your Vinyl window. The caulks are available as an option when you purchase your window. You can also buy the separately at a hardware store.


Let's start with a basic informational video about How to Caulk Windows:


When doing a window replacement, There are 3 different places to seal the window.

   1.) The gap around the outside edge of the window where the Flush Fin touches the outside wall.
   2.) The gap between the window frame, and the wall.
   3.) The gap that the trim creates on the interior of the window.


1. The Gap around the outside edge of the window
Put additional polyurethane sealant around the outside of the exterior of the frame as needed to ensure a good seal between the wall and the window frame.Remember to leave 2 or 3 gaps at the bottom to allow moisture to seep out.


2. The Gap between the window frame and the wall
The space between the window frame and the wall varies on each window. That space should be filled in to insulate the window. To do this you should use an expanding foam sealant. You can buy expanding foam sealant in a can that dispenses through a straw.

Tips: place the foam as close to the exterior wall as possible, use only enough foam to bridge the gap to fill the void. Do not overfill the void, a ½ inch bead will stop the draft and match the R factor of most energy efficient windows. The foam is not an insulation material where more is better, foam is intended to bridge the gap and be an air barrier. Let the foam cure and then review each window to assure all voids are sealed.


3. The gap that the trim creates on the interior of the window.
To fill this gap you should use a siliconized acrylic caulking. Clean the surface, apply the caulking lightly, and wipe any remaining caulking off with a rag. You can see this 2 minutes into the following video:

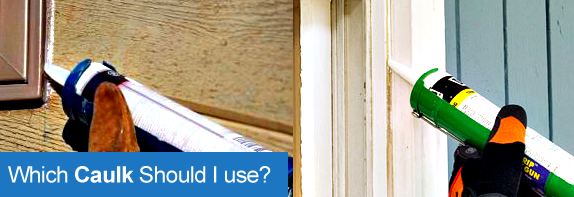
Which caulk should I use?


If you are doing a window installation, we recommend you purchase 1 tube of Polyurethane Caulk, and 1 tube of Siliconized Acrylic Caulk. Use the Polyurethane on the outside of the window, and the Siliconized Acrylic on the inside of the window. You may also need some Expanding Foam Sealant, and Vinyl Trim Strips to fill in and cover up any gaps. This is explained in the Do-It-Yourself article about how to apply caulk.


Siliconized Acrylic Sealant

Siliconized acrylic caulk is a little less durable than polyurethane, but it is easier to work with since it cleans up with water, and better tolerated by those with chemical sensitivities. Siliconized acrylic caulk can be painted over after is applied. The added silicone makes it more water resistant and flexible. It is the best choice for interior caulking, but can also be used on exterior caulking.

The Siliconized acrylic caulk we recommend is called RCS20, made by GE: Product page for Siliconized Acrylic Sealant RCS20


Tuesday, January 3, 2012

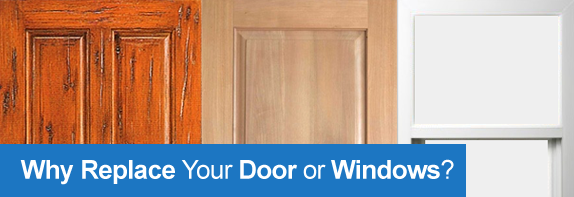
Why replace your door or windows?


You walk or look through them every single day. But how often do you really think about the impact your home's doors and windows have on its value, beauty and livability? Home improvement experts agree that updating your windows and doors can help you save on energy bills, improve the look and infrastructure of your home and add long-lasting value.

"One of the most valuable investments you can make in your home is door and window replacement," says Lou "Mr. Fix It" Manfredini, home improvement editor for the Today Show and "USA Today Weekend Magazine." (*1)

Replacing your windows can mean making many decisions: Is it time to replace? And if so, how do you go about choosing the best replacement windows?

Performance

This is the most compelling reason to change a door or window. On top of testing your patience, windows and doors that stick aren't giving you the optimum benefit in terms of convenience and efficiency. Performance is also tied to safety-if doors are windows are not opening properly they can be a safety hazard.

Energy Efficiency


Check for drafts around doors and windows by moving a lit candle slowly around the edges. If the flame flickers, you have a draft -- one of the biggest drains on the energy efficiency of your home. Drafts add up to real dollars on your heating and cooling bills, so this is, for many people, the impetus to replace their windows or doors.

Maintenance


Older windows and doors require maintenance -- scraping, painting and caulking. Newer windows and doors feature low maintenance cladding, a protective exterior covering that requires minimal maintenance. Many newer windows also make cleaning easy with a convenient tilt feature that allows you to wash them from inside your house.

Aesthetics


Curb appeal is vital if you're selling your house and a satisfying lifestyle enhancement if you plan to stay in your home for years to come. Updated windows and doors not only improve energy efficiency and lower maintenance costs, they make your house look more appealing as well.

Manfredini advises. "The number one attribute you should look for in a replacement window or door is quality." Windows are one of the most noticeable parts of your home, so make sure you look for windows that are of furniture-grade quality.